Saturday, May 28, 2022

FACE RECOGNITION + ATTENDANCE PROJECT | OpenCV Python | Computer Vision

sital
1SP11cs


Basic: 
import cv2
import face_recognition
imgElon = face_recognition.load_image_file('ImagesBasic/Elon Musk.jpg')
imgElon = cv2.cvtColor(imgElon,cv2.COLOR_BGR2RGB)
imgTest = face_recognition.load_image_file('ImagesBasic/Bill gates.jpg')
imgTest = cv2.cvtColor(imgTest,cv2.COLOR_BGR2RGB)
faceLoc = face_recognition.face_locations(imgElon)[0]
encodeElon = face_recognition.face_encodings(imgElon)[0]
cv2.rectangle(imgElon,(faceLoc[3],faceLoc[0]),(faceLoc[1],faceLoc[2]),(255,0,255),2)
faceLocTest = face_recognition.face_locations(imgTest)[0]
encodeTest = face_recognition.face_encodings(imgTest)[0]
cv2.rectangle(imgTest,(faceLocTest[3],faceLocTest[0]),(faceLocTest[1],faceLocTest[2]),(255,0,255),2)
results = face_recognition.compare_faces([encodeElon],encodeTest)
faceDis = face_recognition.face_distance([encodeElon],encodeTest)
print(results,faceDis)
cv2.putText(imgTest,f'{results} {round(faceDis[0],2)}',(50,50),cv2.FONT_HERSHEY_COMPLEX,1,(0,0,255),2)
cv2.imshow('Elon Musk',imgElon)
cv2.imshow('Elon Test',imgTest)
cv2.waitKey(0)


import cv2
import numpy as np
import face_recognition
import os
from datetime import datetime
# from PIL import ImageGrab
path = 'ImagesAttendance'
images = []
classNames = []
myList = os.listdir(path)
print(myList)
for cl in myList:
curImg = cv2.imread(f'{path}/{cl}')
images.append(curImg)
classNames.append(os.path.splitext(cl)[0])
print(classNames)
def findEncodings(images):
encodeList = []
for img in images:
img = cv2.cvtColor(img, cv2.COLOR_BGR2RGB)
encode = face_recognition.face_encodings(img)[0]
encodeList.append(encode)
return encodeList
def markAttendance(name):
with open('Attendance.csv','r+') as f:
myDataList = f.readlines()
nameList = []
for line in myDataList:
entry = line.split(',')
nameList.append(entry[0])
if name not in nameList:
now = datetime.now()
dtString = now.strftime('%H:%M:%S')
f.writelines(f'n{name},{dtString}')
#### FOR CAPTURING SCREEN RATHER THAN WEBCAM
# def captureScreen(bbox=(300,300,690+300,530+300)):
#     capScr = np.array(ImageGrab.grab(bbox))
#     capScr = cv2.cvtColor(capScr, cv2.COLOR_RGB2BGR)
#     return capScr
encodeListKnown = findEncodings(images)
print('Encoding Complete')
cap = cv2.VideoCapture(0)
while True:
success, img = cap.read()
#img = captureScreen()
imgS = cv2.resize(img,(0,0),None,0.25,0.25)
imgS = cv2.cvtColor(imgS, cv2.COLOR_BGR2RGB)
facesCurFrame = face_recognition.face_locations(imgS)
encodesCurFrame = face_recognition.face_encodings(imgS,facesCurFrame)
for encodeFace,faceLoc in zip(encodesCurFrame,facesCurFrame):
matches = face_recognition.compare_faces(encodeListKnown,encodeFace)
faceDis = face_recognition.face_distance(encodeListKnown,encodeFace)
#print(faceDis)
matchIndex = np.argmin(faceDis)
if matches[matchIndex]:
name = classNames[matchIndex].upper()
#print(name)
y1,x2,y2,x1 = faceLoc
y1, x2, y2, x1 = y1*4,x2*4,y2*4,x1*4
cv2.rectangle(img,(x1,y1),(x2,y2),(0,255,0),2)
cv2.rectangle(img,(x1,y2-35),(x2,y2),(0,255,0),cv2.FILLED)
cv2.putText(img,name,(x1+6,y2-6),cv2.FONT_HERSHEY_COMPLEX,1,(255,255,255),2)
markAttendance(name)
cv2.imshow('Webcam',img)
cv2.waitKey(1)


Labeling Unknown faces

1
2
3
4
5
6
7
8
9
if matches[matchIndex]:
    name = classNames[matchIndex].upper()
    #print(name)
    y1,x2,y2,x1 = faceLoc
    y1, x2, y2, x1 = y1*4,x2*4,y2*4,x1*4
    cv2.rectangle(img,(x1,y1),(x2,y2),(0,255,0),2)
    cv2.rectangle(img,(x1,y2-35),(x2,y2),(0,255,0),cv2.FILLED)
    cv2.putText(img,name,(x1+6,y2-6),cv2.FONT_HERSHEY_COMPLEX,1,(255,255,255),2)
    markAttendance(name)

To find the unknown faces we will replace

with this

All this does is to check if the distance to our min face is less than 0.5 or not. If its not then this means the person is unknown so we change the name to unknown and don’t mark the attendance.

https://www.computervision.zone/topic/labeling-unknown-faces/
 

Thursday, May 26, 2022

OpenCV Video Capturing Error : CvCapture_MSMF::initStream Failed to set mediaType


------------------------------------------------------------------------

import cv2 as cv


capture = cv.VideoCapture(0, cv.CAP_DSHOW)


while True:

    isTrue,frame = capture.read()

    cv.imshow('Video',frame)

    if cv.waitKey(20) & 0xFF==ord('d'):

        break


capture.release()

cv.destroyAllWindows()


--------------------------------------


OpenCV Video Capturing Error : CvCapture_MSMF::initStream Failed to set mediaType (stream 0, (640x480 @ 30) MFVideoFormat_RGB24(unsupported media type) import cv2 video = cv2.VideoCapture(0) Error : [ WARN:0] global C:\Users\appveyor\AppData\Local\Temp\1\pip-req-build-oduouqig\opencv\modules\videoio\src\cap_msmf.cpp (682) CvCapture_MSMF::initStream Failed to set mediaType (stream 0, (640x480 @ 30) MFVideoFormat_RGB24(unsupported media type) Solution : Adding the "CAP_DSHOW " argument after 0 in the video capture import cv2 video = cv2.VideoCapture(0, cv2.CAP_DSHOW)


Monday, May 9, 2022

HOW TO FIX - PIP IS NOT RECOGNIZED AS INTERNAL OR EXTERNAL COMMAND

set path:

"C:\Users\sital\AppData\Local\Programs\Python\Python38\Scripts"

to run PIP


HOW TO FIX - PIP IS NOT RECOGNIZED AS INTERNAL OR EXTERNAL COMMAND ERROR IN PYTHON || PIP ERROR


Download and Install pip:

pip can be downloaded and installed using command-line by going through the following steps:

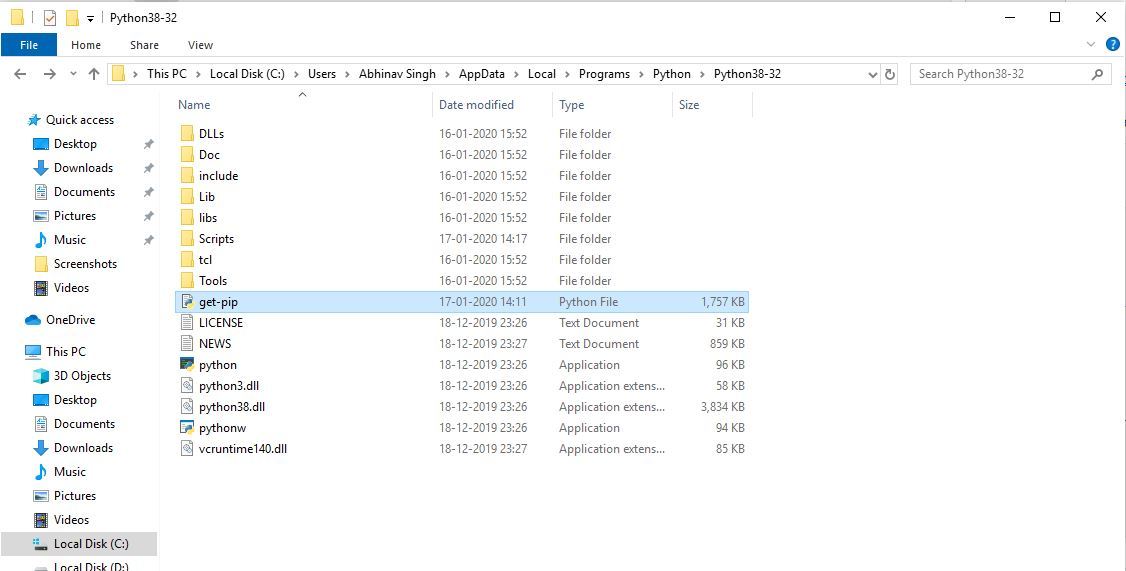
  • Download the get-pip.py file and store it in the same directory as python is installed.
    Downloading and storing get-pip file
  • Change the current path of the directory in the command line to the path of the directory where the above file exists.
    Changing directory path
  • Run the command given below:
    python get-pip.py

    and wait through the installation process.
    Executing the command

  • Voila! pip is now installed on your system.

Verification of the Installation process:

One can easily verify if the pip has been installed correctly by performing a version check on the same. Just go to the command line and execute the following command:

pip -V

Verification of pip


To use Python-tesseract - requires python 2.5+ or python 3.x - first you have to install PIL and pytesseract packages through pip:

pip install Pillow
pip install pytesseract

Then you have to download and install the tesseract OCR:

https://sourceforge.net/projects/tesseract-ocr-alt/?source=typ_redirect

As far as I know it automatically adds it to your PATH variable.

Then use it like this way:

import pytesseract
from PIL import Image

img = Image.open('Capture.PNG')
pytesseract.pytesseract.tesseract_cmd = 'C:\\Program Files (x86)\\Tesseract-OCR\\tesseract.exe'
print( pytesseract.image_to_string(img) )

I hope it helps :)


Thursday, June 10, 2021

OOP in Python


TopicHTMLPDF
All ChaptersNot availableView PDF
Chapter 1. IntroductionView HTMLNot available
Chapter 2. Python basicsView HTMLNot available
Chapter 3. Variables and scopeView HTMLNot available
Chapter 4. Selection control statementsView HTMLNot available
Chapter 5. CollectionsView HTMLNot available
Chapter 6. Loop control statementsView HTMLNot available
Chapter 7. Errors and exceptionsView HTMLNot available
Chapter 8. FunctionsView HTMLNot available
Chapter 9. ClassesView HTMLNot available
Chapter 10. Object-oriented programmingView HTMLNot available
Chapter 11. Packaging and testingView HTMLNot available
Chapter 12. Useful modules in the Standard LibraryView HTMLNot available
Chapter 13. Introduction to GUI programming with tkinterView HTMLNot available
Chapter 14. Sorting, searching and algorithm analysisView HTMLNot available

Introduction to Keras and TensorFlow for Training Deep Learning Classifiers

 ### Introduction to Keras and TensorFlow for Training Deep Learning Classifiers **Keras and TensorFlow** are powerful tools in the realm of...


